Boots the first time
The app blesses the destination and double-checks file integrity so lab Macs and production workstations reboot without drama.
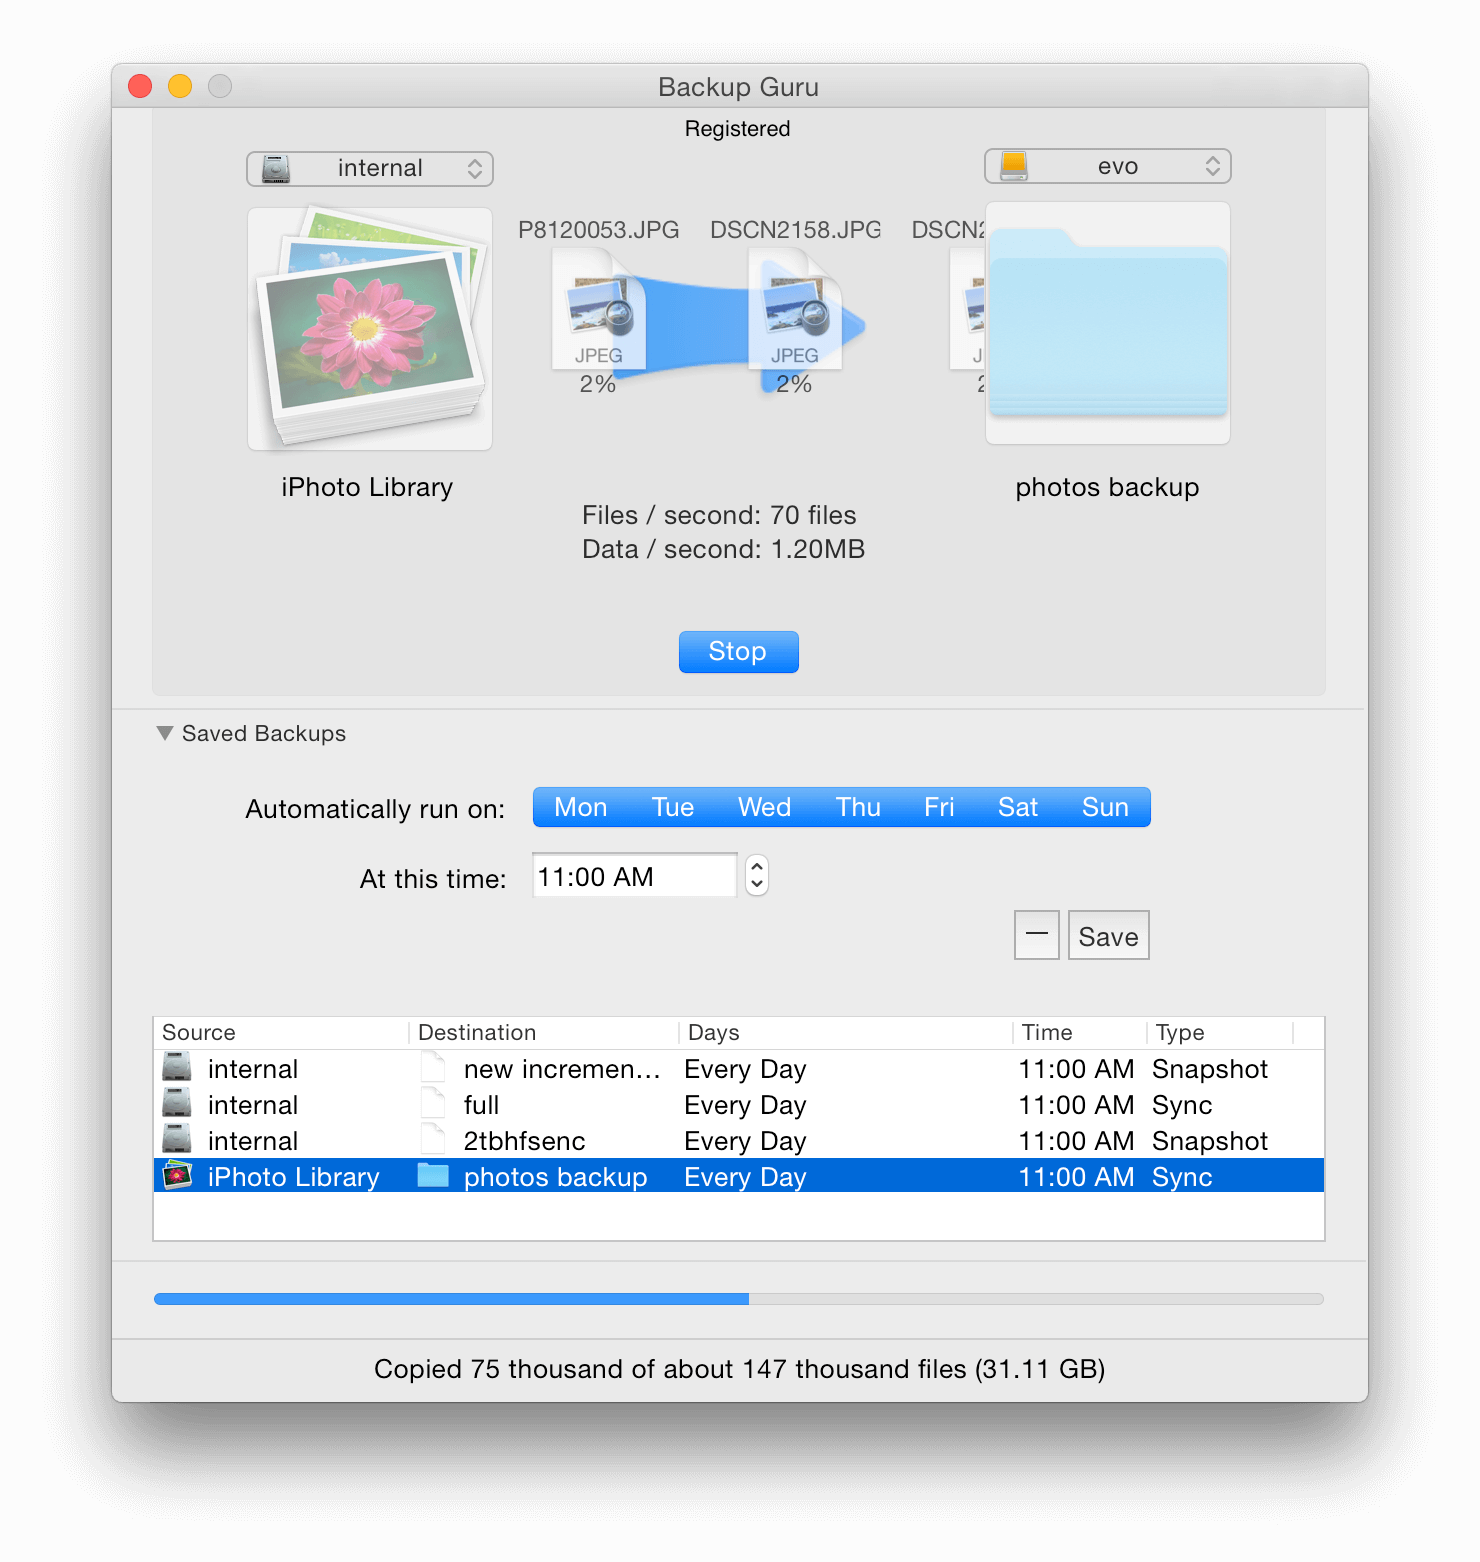
Create verified clones, incremental snapshots, and Finder-integrated restores without background daemons or surprises.
The app blesses the destination and double-checks file integrity so lab Macs and production workstations reboot without drama.
Hard-links reuse unchanged files, letting you keep dozens of restore points on a single SSD while still browsing them like full clones.
Kick off clones, sync folders, or restore specific items directly from Finder’s contextual menu—no scripts or daemons required.
Attach an external SSD or RAID. Mac Backup Guru will format it for APFS or HFS+ if you want a clean slate.
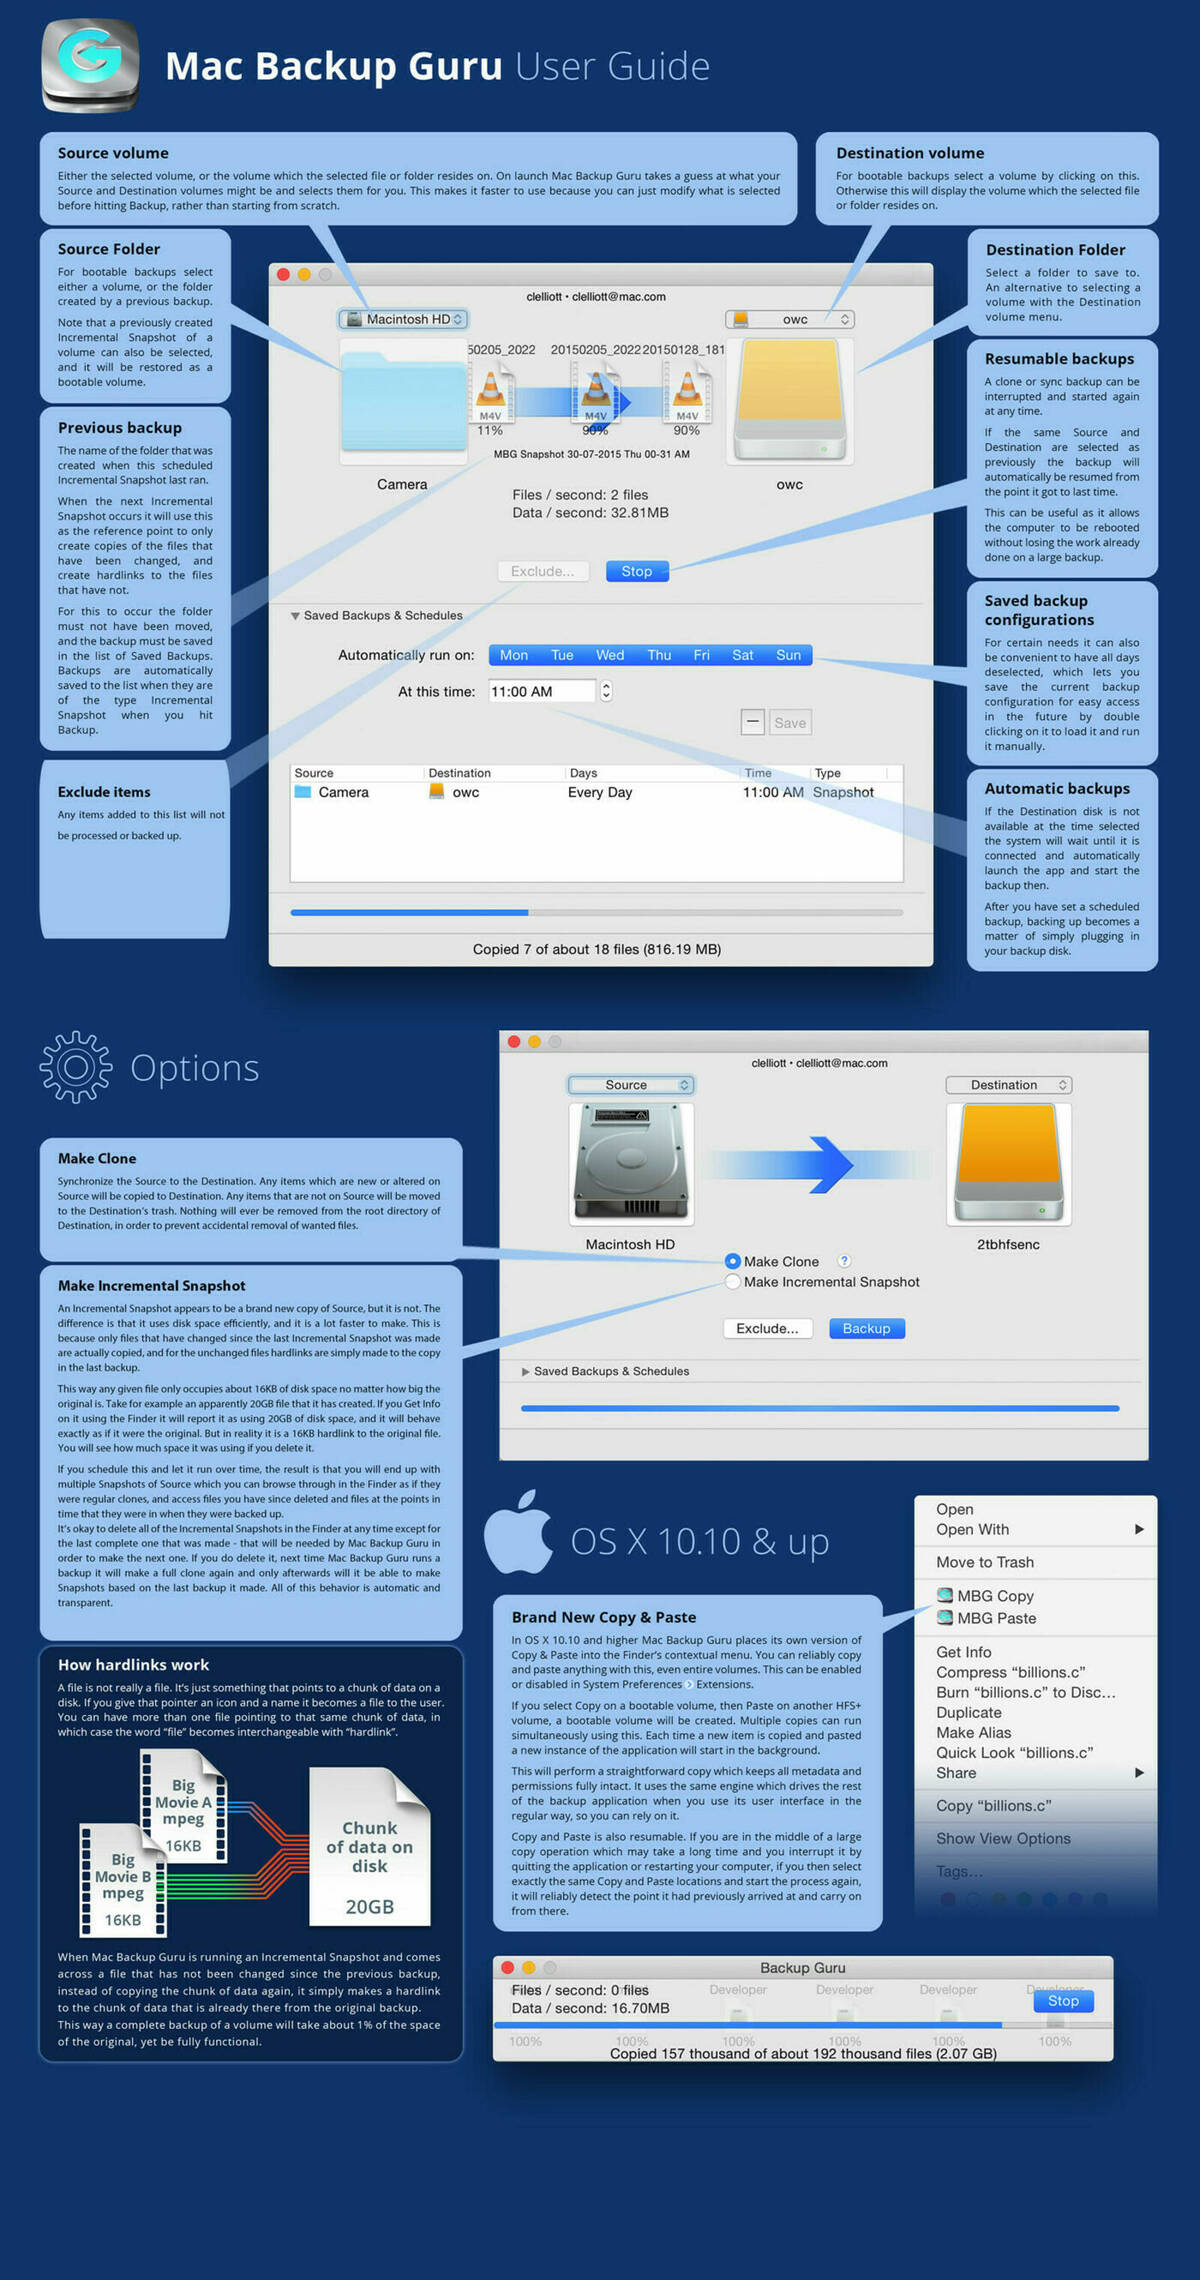
Run a full clone for a one-to-one bootable copy, then schedule snapshots to keep deltas without rewriting the entire disk.
The app compares source and destination, logs what changed, and blesses the clone so you know it will boot.
Hold Power on Apple silicon (Option on Intel) to boot from the clone, or restore individual files straight from Finder.
Need additional protection? Pair this workflow with Install Disk Creator for a fresh macOS installer.
Mac Backup Guru creates bootable clones and incremental snapshots without background daemons. If you want the original guides you wrote, they’re still available: the quick visual guide and the full product manual. The latest build is always MacBackupGuru.zip.
Create a byte-for-byte, bootable copy of any volume. The engine handles petabyte-scale data, complex ACLs, and system files that Finder copies usually miss.
Update an existing clone in a fraction of the time. Only the files that changed are written, and anything else on the destination disk stays untouched.
Snapshots behave like full clones but reuse unchanged files with hard links. A 500 GB source can keep months of restore points on a 2 TB drive while consuming just a few gigabytes per run.
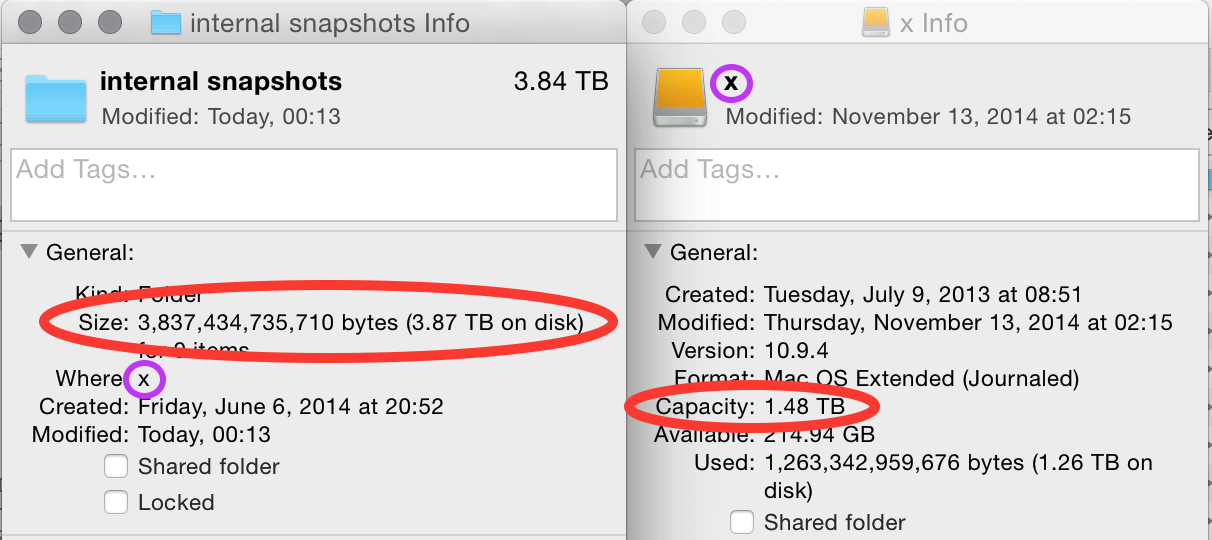
Tip: Only the newest completed snapshot has to stick around. Prune older snapshots manually or set the retention count so Mac Backup Guru deletes the oldest copies automatically after each run.
Share your setup, source drives, and any gotchas. We’ll help you tune the schedule, snapshot retention, or cloning strategy.