Mac Backup Guru User Manual
Topics
- Create a direct clone of a volume or folder
- Create an Incremental Snapshot of a volume or folder for storing the history of files
- Schedule backups to automatically occur on a chosen date & time
- Prune old backups
- Exclude Files
- Preferences
- Using the contextual menu
Bootable Clone:
Note (2026): The steps below describe older versions of macOS. Modern macOS seals the system volume, so a clone on its own is no longer bootable — Apple’s installer must write the system first, then Mac Backup Guru copies your data onto it. See the current bootable backup guide. Clones remain the right way to protect your data either way.
A clone of your data is something that you always need any time you have data that you would rather not lose. Creating a clone of a volume onto another disk will allow you to boot your operating system from that external disk if your regular startup disk happens to stop working at any point and carry on from where you left off.
To create a Bootable Clone:
- Select a bootable volume in Source. In most cases this is the internal disk, which Mac Backup Guru automatically selects when it starts up, so this step is usually unnecessary.
- Select an external disk in Destination. It is fastest to select it using the drop down list.
- Click Backup and let it go. It'll usually take anywhere from 10 minutes to a few hours, depending on how much data you have on your disk.
- Reboot and hold down the option key while your Mac is starting up. Select your external disk to boot from it. Everything will look just as it did before the backup finished.
Important notes if you want the volume to be bootable:
- The destination must be formatted HFS+ (or APFS on latest macOS). Format drives from Disk Utility before you begin.
- If the Mac does not boot from the clone, select it in System Settings → Startup Disk and restart. Try a different USB cable or enclosure if the issue persists.
After the initial clone you can update it manually or via a schedule. Mac Backup Guru compares file size and modification date so only changed files are copied.
Incremental Snapshot:
Incremental Snapshots create timestamped folders on the destination so you can roll back to earlier versions.
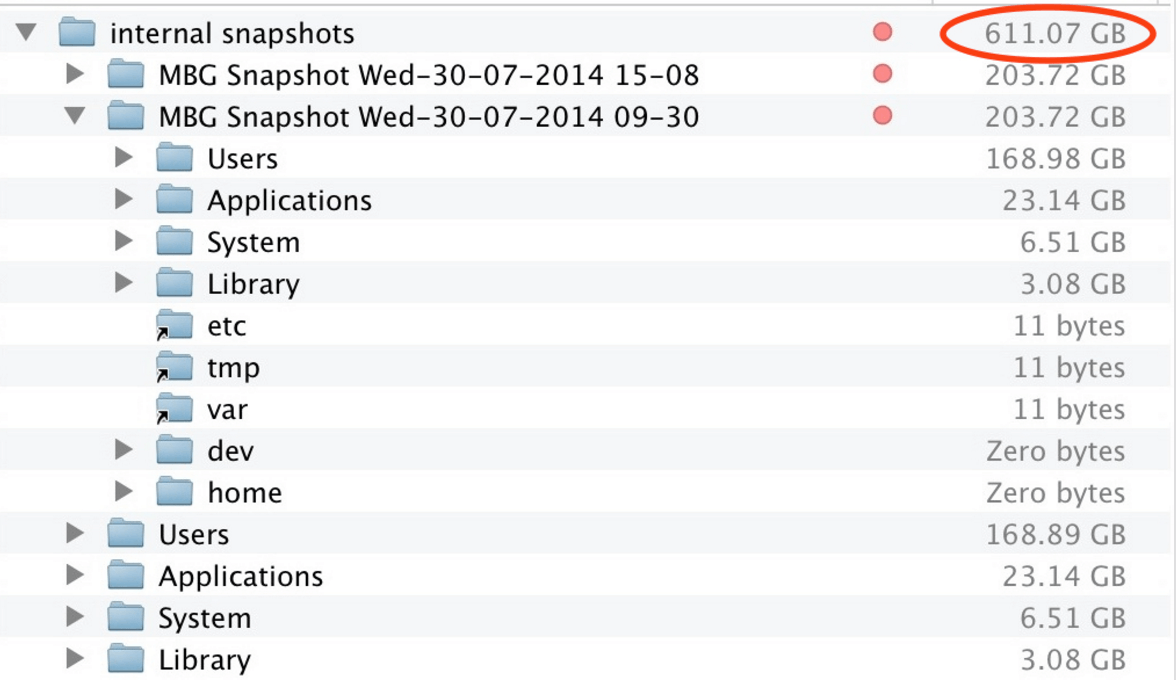
Although the snapshots appear to use a lot of space, they are comprised of hard links so they reuse existing data. A 250 GB external drive can store hundreds of gigabytes of historical copies while only using the delta between runs.
Scheduling backups
Use the scheduler if you want hands-off backups. Set the frequency (daily, weekly, monthly) and Mac Backup Guru will wake up to run the job when the drive is connected.
Pruning old backups
Enable pruning to automatically delete the oldest snapshots once you pass the retention count. This keeps your destination disk tidy.
Excluding files
Add folders to the exclusion list if you do not want caches or other transient data. This keeps clones smaller and faster.
Preferences
Preferences let you tweak logging, completion notifications, and Finder integration. Leave defaults unless you have a specific workflow.
Using the contextual menu
Enable the Finder extension in Settings → Extensions once the app is installed.
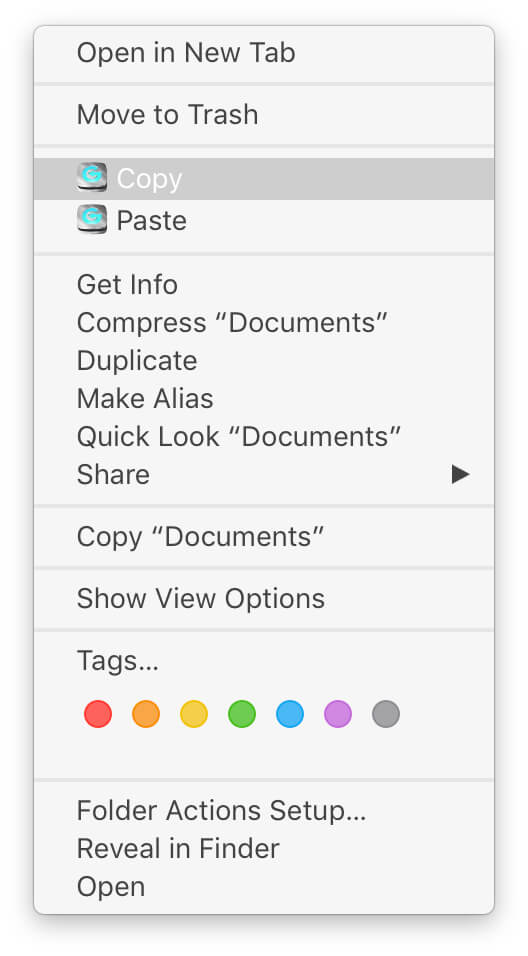
This adds Copy with Mac Backup Guru and Paste with Mac Backup Guru entries so you can kick off jobs directly from the Finder.
Still new to the app? Read the Mac Backup Guru overview for a guided tour.